Starting seeds can be tricky, but most problems have simple solutions. Whether you're dealing with poor germination, fungal diseases, or weak seedlings, this guide has you covered.
Quick Fixes for Common Problems:
- Seeds not sprouting? Check moisture, temperature (70–85°F), and seed quality.
- Seedlings dying from damping-off? Avoid overwatering, sterilize tools, and improve airflow.
- Leggy or weak seedlings? Provide adequate light (2–3 inches above plants) and avoid overwatering.
- Fungal issues? Use sterile soil, maintain humidity (70–90%), and ensure good drainage.
- Storage problems? Keep seeds in a cool, dry, dark place (40–50°F).
Tools You’ll Need:
- Heat mats with thermostats for consistent warmth.
- Humidity domes for moisture control. (Only necessary until germination has started.)
- Hygrometers and thermometers for monitoring.
- Sterilized soil and containers to prevent contamination.
By addressing these issues early, you can ensure stronger germination and healthier seedlings. Let’s dive into the details.
Solving 9 Problems With Seed Germination & Young Seedlings
Why Seeds Fail to Germinate
Understanding why cannabis seeds fail to sprout can help you avoid common pitfalls. The good news? Most of these factors are within your control.
One major issue is poor seed quality, which may hide internal defects that stop germination in its tracks. Another culprit is improper moisture levels - too much water can suffocate seeds, while too little prevents them from starting the germination process.
Temperature also plays a critical role. Extreme heat or cold can disrupt germination entirely. On top of that, inadequate airflow can lead to stagnant conditions, encouraging mold and fungal growth. Finally, choosing the wrong germination method can waste perfectly good seeds.
To give your seeds the best chance, maintain balanced moisture levels - not too wet or too dry - and ensure good airflow to prevent mold. Let’s dive deeper into how seed quality, storage, and environmental factors impact germination.
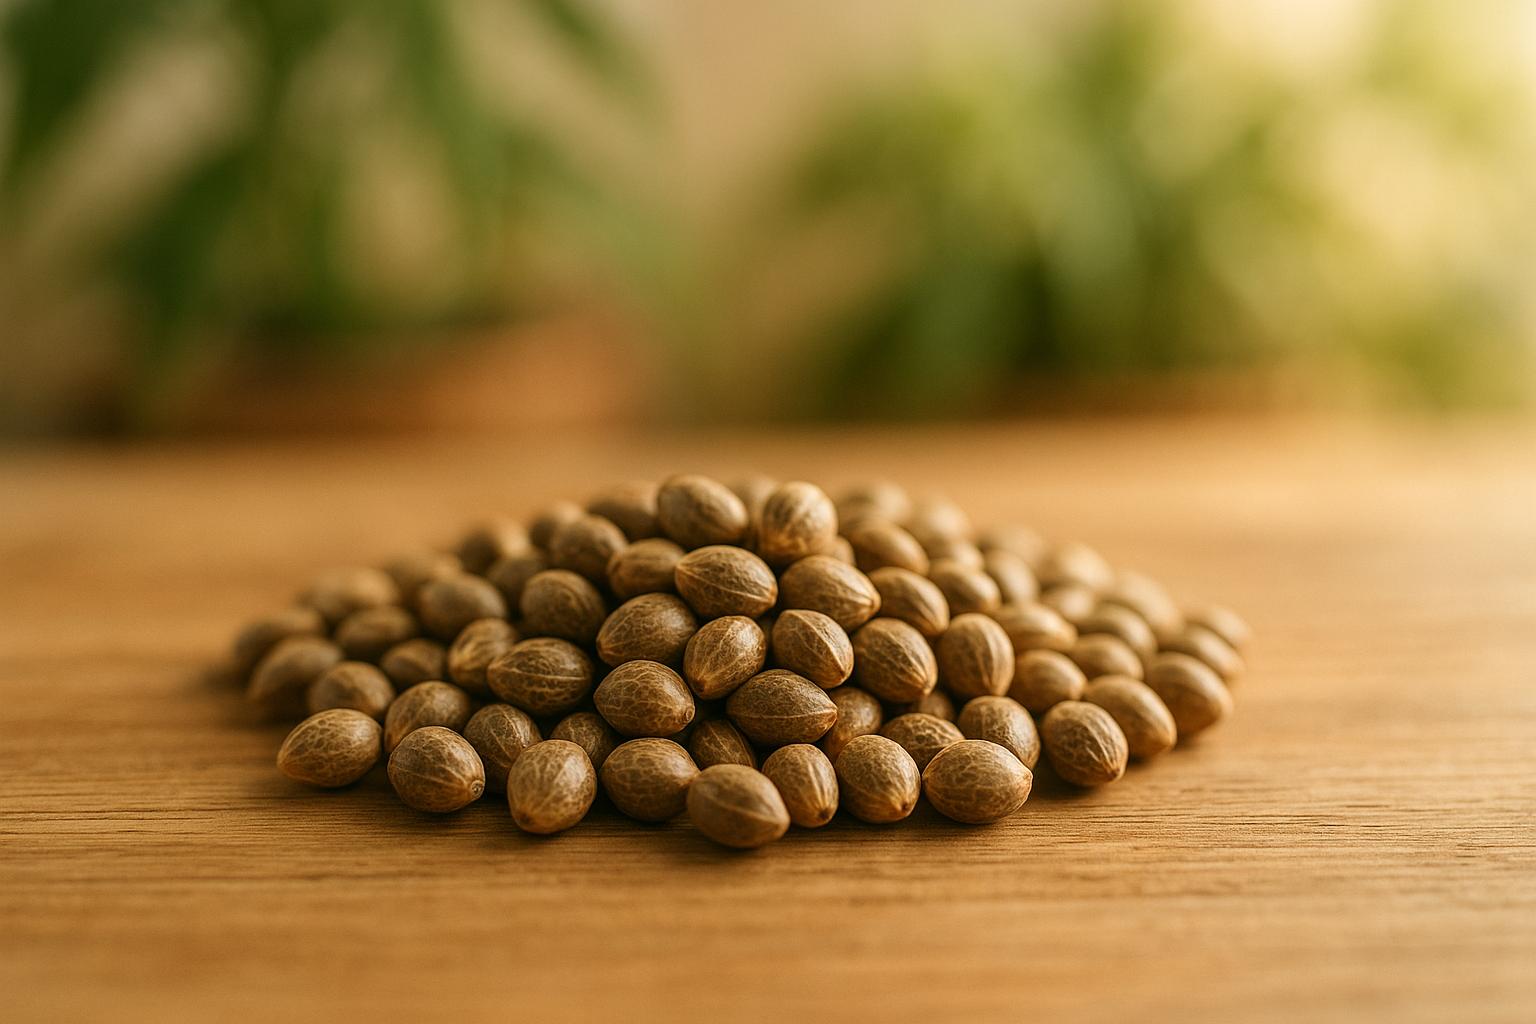
How Seed Quality and Storage Affect Germination
The age and storage conditions of your seeds significantly influence their ability to sprout. Properly stored fresh seeds (1–2 years old) usually have germination rates above 90%. However, seeds aged 3–5 years - even if stored under ideal conditions - may see germination rates drop to 70–80%. Beyond five years, the success rate often falls below 50%.
To keep seeds viable, store them in a dry, cool, and dark environment. The ideal temperature range is between 40°F and 50°F (4°C to 10°C), with minimal temperature fluctuations. Even small amounts of humidity can trigger premature sprouting, mold, or seed degradation. Airtight containers, such as glass jars or vacuum-sealed bags, are excellent for protecting seeds. Handle them gently during transport and preparation to avoid damaging their fragile structures.
Now, let’s explore how environmental factors further shape germination success.
Temperature, Moisture, and Light Requirements
Cannabis seeds rely on specific environmental conditions to germinate. They need warmth, consistent moisture, and darkness to break dormancy.
Temperature is one of the most critical factors. The optimal range for germination is 70°F to 85°F (21°C to 29°C). Using a thermostat-controlled heat mat can help maintain steady warmth and prevent temperature swings.
Moisture management is equally important. The growing medium should stay consistently moist but not waterlogged, as overwatering is a common mistake. Aim for relative humidity levels of around 60% during germination. Airflow is also important, so if you’re using a humidity dome, monitor it closely and be ready to remove it one you see a sprout. A hygrometer can help you monitor and maintain these levels effectively.
Interestingly, cannabis seeds don’t need light to germinate. They should remain in the dark until seedlings emerge. At that point, introduce indirect or low-intensity light to support their growth.
Under the right conditions, germination can start within 12–36 hours after seeds absorb moisture. Most cannabis seeds sprout within 1 to 7 days, although older or lower-quality seeds may take longer. With these basics covered, you'll be ready to explore more advanced germination techniques later in the guide.
How to Fix Germination Problems
If your seeds aren’t sprouting, don’t worry - there are proven ways to turn things around. Germination issues often come down to poor seed quality, improper moisture levels, or temperature problems. By tackling these root causes and using some tried-and-true techniques, you can boost your success rate by up to 30%. Let’s dive into methods that address these common hurdles and help you achieve consistent results.
"Think of seed germination like building the foundation of a house - every little detail matters if you want your plants to grow strong." – James Bean, C.E.O
Better Germination Methods
When dealing with stubborn or older seeds, a few effective techniques can make all the difference.
Pre-soak in seaweed solution: Soaking seeds in a nutrient-rich seaweed solution gives them an energy boost to kickstart germination. Mix 1–2 teaspoons of liquid seaweed extract with a liter of water and soak your seeds for 6–12 hours before planting. This simple step can help break seed dormancy and speed up sprouting.
Scarification: For seeds with tough outer shells, scarification can help. Gently rub the seeds with fine-grit sandpaper until the surface changes slightly. This process allows the seeds to absorb water more easily, increasing their chances of germinating.
Sterilization and oxygenation: A diluted hydrogen peroxide soak is another helpful method. Combine one part 3% hydrogen peroxide with five parts water and soak your seeds for 15–30 minutes. This not only sterilizes the seeds but also provides extra oxygen to jumpstart germination.
Direct soil planting: Sometimes, planting seeds directly in soil is more effective than using water-based methods. Plant seeds at a depth of 0.2–0.4 inches (0.5–1.0 cm), and make sure to use dechlorinated water (let tap water sit for 24 hours) to avoid contamination. Keep the soil consistently moist but not waterlogged - too much water can block oxygen, while too little can halt the sprouting process.
Beneficial microbes: Adding mycorrhizal inoculants to your soil can enhance germination by improving nutrient absorption and disease resistance. This gives your seedlings a healthier start right from the beginning.
Tools That Improve Germination Rates
Having the right tools can make it much easier to create the perfect environment for seed germination.
Heat mats with thermostats: Temperature control is crucial for germination. Using a thermostat-controlled heat mat, like the VIVOSUN 10" x 20.75" Seedling Heat Mat and Digital Thermostat Combo Set ($26.99), helps maintain a steady temperature of around 78°F (26°C). Without a thermostat, heat mats can overheat and damage seeds.
Humidity domes: Use with caution. While these create a moist, controlled environment ideal for sprouting seeds, excessive humidity can cause problems. Cover your seed trays with a humidity dome or plastic wrap to maintain humidity levels between 70% and 90%. Once you see the first signs of germination, remove the dome and provide light and air circulation to avoid mold issues.
"Humidity domes help protect the seeds, maintain moisture levels, and create the perfect environment for those seeds to get a great start. While many of your seeds will likely germinate without the help of a humidity dome, using one will increase your germination rates significantly and decrease the time to sprouting for most seeds." – Bootstrap Farmer
Complete germination kits: For a convenient all-in-one solution, consider a germination kit. The AC Infinity Heavy-Duty Humidity Dome 5x8 Germination Kit ($84.99) includes a waterproof seedling mat, humidity dome, and LED grow light bars. With a 4.6-star rating from 701 Amazon reviews, it’s praised for its quality and functionality. For those on a budget, the AC Infinity Humidity Dome Kit without lights ($36.99) still offers excellent moisture and temperature control.
How to Prevent Damping-Off Disease
Damping-off disease is a serious challenge for seed starting. This aggressive fungal infection can wipe out seedlings in just a matter of days, making prevention absolutely essential.
"Damping off is a fast-acting condition that can kill cannabis plants mere days after they sprout from the ground." – Max Sargent, Journalist, philosopher, writer, musician
What Causes Damping-Off
This disease is caused by a group of fungal pathogens working together to attack young plants. Pythium is a key culprit, targeting roots and killing them quickly, while Phytophthora thrives in soggy growing conditions, leading to major crop losses. Other fungi like Rhizoctonia and Fusarium also contribute. Fusarium is especially tricky because its spores can spread through wind, fungus gnats, or splashed water during irrigation.
These fungi thrive in environments that are cool and damp. Overwatering, poor drainage, and overcrowding create the perfect conditions for them to spread. Factors like low soil temperatures, high humidity, and limited airflow further increase the risk, especially when seedlings are stressed or packed too closely together.
Contaminated materials are another common source of infection. This includes infected soil, compost, or even seeds. Reused pots and tools can also carry fungal spores from previous seasons. Symptoms of damping-off include wilted, waterlogged seedlings, discolored lower stems, and roots that turn brown and mushy. In severe cases, seeds may not sprout at all (pre-emergent damping-off), or healthy-looking seedlings can suddenly collapse (post-emergent damping-off). Understanding these causes is the first step in protecting your seedlings.
How to Prevent Damping-Off
Preventing damping-off means creating an environment where these fungal pathogens can't thrive. Since infected seedlings can't be saved once the disease sets in, proactive steps are crucial.
Start by sterilizing your pots, trays, and tools. Soak them in a 10% bleach solution for 30 minutes to kill any lingering spores.
Choose your soil carefully. Use fresh, pasteurized, or steam-sterilized potting mix. Avoid garden soil or homemade compost unless it's been sterilized, as these can harbor damping-off pathogens. Seed-starting mixes are ideal because they drain better than regular potting soil, reducing the risk of overwatering.
Water seedlings with clean, lukewarm water (68°F–77°F) to keep the soil moist but not soggy. Mist the plants instead of heavy watering to maintain the right moisture balance.
Keep the soil temperature between 70°F and 75°F with a heating pad to encourage quick sprouting. Plant seeds at a shallow depth to further speed up germination.
Good airflow is also key. Thin out crowded seedlings and use a small fan to improve circulation. Providing 12 to 16 hours of light daily with a fluorescent or grow light will support strong, healthy growth.
Be mindful of how you fertilize. Avoid overloading seedlings with nitrogen, as it can make them more vulnerable to disease. Instead, wait until they develop several true leaves before applying fertilizer at 1/4 strength. Stronger plants are naturally better equipped to fight off infections.
"Seedlings with damping-off will die and cannot be saved. Proper prevention is the only way to avoid problems with this disease." – Brian Hudelson, UW-Madison Plant Pathology
sbb-itb-1add288
Controlling Temperature and Humidity for Seedlings
Getting the temperature and humidity just right is crucial when starting cannabis seeds. These young plants are incredibly sensitive to their surroundings, and even minor changes can affect their ability to germinate and thrive.
"There is a hierarchy of abiotic environmental conditions, and it starts with temperature. Seeds can still germinate without light, little to no moisture, and in low or high humidity, but must be in the right temperature range to germinate." - Drew Hundelt, Product Manager & Content Specialist, Harris Seeds
Why does this matter so much? Seedlings and clones rely on high humidity levels because their root systems are still developing. Instead of drawing moisture from the soil, they absorb it through their leaves. Without the right balance of temperature and humidity, you risk poor germination, stunted growth, and issues like damping-off. Let’s dive into the specific conditions cannabis seedlings need to thrive.
Ideal Temperature and Humidity Ranges
Cannabis seedlings have specific environmental needs that shift as they grow. During the germination phase, warmth and moisture are key to breaking seed dormancy and encouraging sprouting.
- For germination, soil temperatures should stay between 70°F and 85°F (21°C to 29°C). This range ensures reliable germination for most cannabis strains.
- Humidity during this phase should remain high, ideally between 70% and 90%, to provide the moisture necessary for seeds to soften and sprout.
Once your seeds have sprouted and entered the seedling stage, their needs change slightly:
| Growth Stage | Day Temperature (Lights On) | Night Temperature (Lights Off) | Humidity Level |
|---|---|---|---|
| Germination | 70-85°F | 70-85°F | 70-90% |
| Seedling Stage | 70-85°F | 65-80°F | 75-85% |
As seedlings grow stronger and their root systems develop, you can gradually lower the humidity. For indoor plants, aim for 35-60%, with 45-55% being ideal for steady, healthy growth. Keeping a close eye on soil temperature is also essential to avoid stress caused by sudden changes.
Equipment for Climate Control
Achieving and maintaining these precise conditions often requires the right tools. Here’s how you can create the perfect environment for your seedlings:
- Heat mats: These are a must for maintaining consistent soil temperatures, especially for warm-season plants like cannabis. Use a heat mat with a thermostat to keep soil temperatures between 65°F and 75°F (18°C to 24°C) for optimal germination.
- Humidity domes: These plastic covers help trap moisture around your seed trays, creating a high-humidity microclimate. Look for vented domes that allow some airflow to prevent issues like mildew while still keeping moisture levels high. Make sure to remove the dome once germination has started.
- Monitoring tools: A digital thermometer and hygrometer let you keep a constant eye on temperature and humidity. Check them daily to ensure your conditions stay within the ideal range.
To fine-tune your setup, consider adding a humidifier to raise moisture levels when needed or small ventilation fans to improve airflow. Proper airflow helps distribute moisture evenly and prevents overly humid pockets where fungi can thrive. With these tools, you can create a stable environment that gives your seedlings the best chance to grow strong and healthy.
Fixing Common Seedling Growth Problems
After tackling germination and environmental challenges, the next step in cultivating healthy cannabis plants is addressing seedling growth issues. Even under ideal conditions, seedlings can encounter problems. Healthy seedlings should have sturdy stems and vibrant, clean leaves. However, if you notice leggy, yellow, or stunted growth, something is likely off.
The main culprits often include improper watering, imbalanced nutrients, or poor airflow. Identifying and addressing these issues early can prevent them from escalating.
Strengthening Weak Seedlings
Building on the importance of proper temperature and humidity management, let’s explore how to address common growth problems in seedlings.
Stretchy or weak seedlings often point to insufficient light. When light levels are too low, seedlings stretch upward, searching for better illumination. As Jonathan Ebba, a Landscape & Greenhouse Field Specialist, explains:
"Low light conditions cause seedlings to stretch in search of better illumination."
To fix this, position grow lights 2–3 inches above your seedlings and adjust as they grow. If your seedlings are already leggy, move the lights closer immediately to encourage sturdier development.
Overwatering is another common issue, as it deprives roots of oxygen. To avoid this, water only when the top inch of soil feels dry, and ensure your containers have proper drainage. Using well-draining soil is critical because overly wet conditions can be more harmful than short periods of dryness.
Temperature consistency is also essential. Maintain a range of 72–79°F (22–26°C). If temperatures drop, use heat mats to provide steady warmth, which supports strong root growth.
Finally, introducing gentle, indirect airflow can help strengthen stems and regulate humidity. A small fan on low speed, positioned to avoid blowing directly on the seedlings, can make a big difference.
Proper Feeding and Lighting for Seedlings
Once structural problems are under control, turn your attention to nutrition and lighting. Both play a critical role in ensuring vigorous seedling growth. Cannabis seedlings are particularly delicate, so a cautious approach is crucial.
Nutrient management starts with avoiding overfeeding. Nitrogen deficiency is a common issue in cannabis plants, but adding too many nutrients early on can harm young plants. Begin with a high-quality potting mix and hold off on additional nutrients until the plants are a few weeks old. Keep an eye out for signs like discolored leaves, stunted growth, or drooping, and check your soil pH if problems arise - incorrect pH levels can block nutrient absorption.
Lighting is equally important. From day one, seedlings require 300–500 micromoles of light intensity to prevent stretching. For the first 10–14 days, compact fluorescent lamps (CFLs) with a blue light spectrum work particularly well.
Seedlings need 14–16 hours of light daily, paired with at least 8 hours of darkness. Using an outlet timer can help maintain a consistent light schedule. Keep lights 4–6 inches above the seedlings, raising them as the plants grow, to ensure even light distribution.
Fluorescent lights are often preferred over incandescent bulbs because they emit light in the blue to blue-green spectrum while generating less heat. LED lights, though more expensive upfront, offer better energy efficiency.
Pay close attention to your seedlings. If they start bending toward the light or becoming leggy, move the lights closer or extend their exposure. Pale green or yellow leaves may signal insufficient light for chlorophyll production, while scorched or bleached leaves suggest the lights are too intense or too close.
Daily monitoring is crucial. Healthy seedlings with thick stems and vibrant leaves are better equipped to handle the stress of transplanting and are more likely to thrive as mature plants.
Advanced Methods for Difficult Seeds
When standard germination methods fall short, advanced techniques can help bring life to challenging cannabis seeds. These methods are especially useful for seeds that have been stored for a long time or have a natural dormancy that’s tough to break. Techniques like seed priming with gibberellic acid (GA3), hydropriming, and cold stratification can make a significant difference in germination success.
Using Gibberellic Acid and Seed Priming
Gibberellic acid (GA3) is a plant hormone that plays a key role in breaking seed dormancy. It works by suppressing DELLA proteins, promoting embryo growth, and activating the seed’s stored energy reserves. Studies have shown that using GA3 can significantly improve germination rates and early plant growth in cannabis.
For cannabis seeds, particularly industrial hemp, research suggests that GA3 concentrations of 400–600 mg/L can enhance drought tolerance and germination, even under stress. To use GA3, you’ll need to determine the right concentration for your seeds. Generally, soaking seeds for 2 to 8 hours is effective, with longer times being more beneficial for older or tougher seeds. After soaking, rinse the seeds thoroughly with distilled water and let them dry completely before planting.
When working with GA3, safety is key. Always wear gloves, ensure proper ventilation, and store freshly prepared solutions in the refrigerator if you plan to use them soon.
If you’re looking for a chemical-free option, hydropriming is a gentler alternative. This method involves keeping seeds in a consistently moist environment at controlled temperatures to activate the enzymes needed for germination.
Cold Treatment for Hard Seeds
Temperature adjustments can also help stubborn seeds germinate. Cold stratification mimics the natural seasonal changes seeds experience in the wild, signaling that it’s time to grow. Research, including a method developed by the University of Oregon, suggests hydrating seeds and keeping them at 50°F (10°C) for five days before moving them to standard germination conditions. This is particularly effective for older seeds or those with "wild" genetics, as it replicates the passing of winter and the arrival of favorable growing conditions.
There are two common ways to perform cold stratification. The refrigerator method offers precise control: place moistened seeds in an opaque container and store them in the fridge for five days, ensuring they remain in complete darkness. Alternatively, the "box of earth" method is a more natural approach. It involves partially burying a seed container in cool outdoor soil, allowing for gradual temperature changes.
For extremely resistant seeds, combining cold stratification with a mild seed coat treatment can improve water absorption. A simple rinse using a solution of 1/4 cup of 3% hydrogen peroxide mixed with 1/2 cup distilled water can soften the seed coat while also reducing the risk of fungal pathogens. This method is particularly useful for seeds affected by long-term dormancy or poor storage conditions.
Conclusion: Getting Seeds Started Successfully
Getting seeds off to a strong start hinges on understanding the basics and keeping environmental factors steady.
Begin with high-quality seeds from trusted seed banks and store them properly - away from light and extreme temperatures - to maintain their viability. For the seedling stage, aim for temperatures between 72–79°F and around 70% humidity to create ideal growing conditions.
To avoid common pitfalls, stick to sterile equipment, ensure good drainage, and be cautious with watering. For an extra boost, treatments like a 1% hydrogen peroxide solution can significantly improve germination rates, increasing them from 47.5% to 82.5%.
Tools like heat mats, humidity domes, and gentle airflow can help maintain a controlled environment. Plant seeds at the right depth (0.2–0.4 inches) and monitor them daily. Look for signs of healthy growth - vibrant green leaves, upright stems, and well-formed foliage. If you notice any issues, such as discoloration or drooping, adjust temperature, humidity, or watering immediately to get plants back on track.
Whether working with fresh seeds or older ones, the key principles remain the same: provide optimal conditions, keep your tools clean, and address problems quickly. By following these steps, you’ll set the stage for stronger germination, healthier seedlings, and a successful grow.
FAQs
How can I boost the germination success of older cannabis seeds?
Boosting the germination rates of older cannabis seeds takes a bit of extra care, but it's definitely doable with a few simple techniques. Start by soaking the seeds in pH-balanced distilled water for 24–48 hours. This helps rehydrate and soften the outer shell, which is often the toughest barrier for older seeds. Want to take it up a notch? Add a small amount of hydrogen peroxide to the water. This can help ward off pathogens that might interfere with germination.
Another handy trick is scarifying the seeds. This involves gently rubbing the seed coat with fine sandpaper or an emery board. The goal here is to weaken the outer layer just enough to make it easier for the sprout to break through. Once prepped, make sure your germination setup is dialed in with consistent warmth - somewhere in the range of 75–80°F - and moderate humidity. A seedling heat mat can be a great tool to maintain the right temperature.
By combining these methods, you'll give those older seeds a much better shot at sprouting successfully.
What are the signs of damping-off in seedlings, and how can I prevent it?
Damping-off is a frustrating problem that can wreak havoc on young seedlings. If you notice seedlings that fail to sprout, stems that look thin or water-soaked, mushy leaves, or even a cobweb-like mold on the soil surface, you’re likely dealing with this issue.
To keep damping-off at bay, start with sterilized pots and fresh, high-quality potting soil. Be mindful of watering — keep the soil moist but never overly wet — and ensure good air circulation around your seedlings. Tools like seedling heat mats and humidity domes can help you maintain the ideal temperature and humidity levels while minimizing fungal risks. A clean, well-maintained growing space is key to protecting your seedlings and giving them the best chance to thrive.
What are the best tools to control temperature and humidity for successful seed germination?
To get the temperature and humidity just right for seed germination, a few key tools can make all the difference. Start with heat mats, which deliver consistent warmth — essential for helping seeds sprout, especially in cooler conditions. Combine this with humidity domes to lock in moisture and maintain a stable, humid atmosphere that supports healthy seedling development. Adding a thermostat to your setup lets you control the heat mat’s temperature, keeping it in the ideal range of 70–80°F. Together, these tools create the perfect conditions for your seeds to thrive and grow into strong seedlings.